
Mastering the Markets: A Comprehensive Guide to the Triple Moving Average Crossover Strategy
Welcome to the world of technical analysis, a realm where we study past price movements to forecast future market behavior. As traders, we are constantly seeking reliable tools to help us identify trends, pinpoint potential entry and exit points, and manage our risk effectively. Among the myriad of indicators available, moving averages stand out as fundamental building blocks. They are versatile, widely used, and relatively simple to understand.
While you might already be familiar with using a single moving average to gauge the general direction or a pair of moving averages to signal crosses, the Triple Moving Average Crossover strategy takes this concept a step further. By employing three moving averages of different lengths, we can gain a more nuanced perspective on market momentum, confirm trend strength, and potentially filter out some of the false signals that simpler systems might generate. Think of it as having multiple perspectives confirming a view, rather than relying on just one or two.
In this comprehensive guide, we will embark on a journey to understand the Triple Moving Average Crossover strategy from the ground up. We will start with the basics of moving averages, delve into the mechanics of the three-line system, explore how to interpret its signals for trend identification and momentum assessment, and finally, discuss practical implementation strategies, including entry/exit points, risk management, and combining it with other tools for enhanced reliability. Whether you are a newcomer eager to learn a foundational strategy or an experienced trader looking to refine your approach, this deep dive is designed to equip you with the knowledge to master this powerful technique.

At its core, a moving average (MA) is simply a technical indicator that calculates the average price of an asset over a specified period of time. Its primary purpose is to smooth out price data, which can often be volatile and noisy, making it easier to identify the underlying trend. Imagine charting the average test scores of a student over several semesters – the individual scores might fluctuate wildly, but the average over time shows whether their performance is generally improving, declining, or staying consistent. Moving averages do the same for market prices.
By averaging prices over a rolling window, the moving average line filters out short-term price fluctuations, presenting a clearer picture of the market’s direction. When the price is consistently above the moving average, it suggests an uptrend is in effect. Conversely, when the price stays below the moving average, it signals a potential downtrend. The slope of the moving average line itself also gives us clues: an upward sloping MA suggests bullish momentum, while a downward slope indicates bearish pressure.
Moving averages come in several forms, but the two most common are the Simple Moving Average (SMA) and the Exponential Moving Average (EMA). Understanding the difference between these two is crucial, especially when working with strategies that rely on responsiveness to recent price changes.
| Type | Calculation Method | Responsiveness to Price Changes |
|---|---|---|
| Simple Moving Average (SMA) | Averages the closing prices over a specified period. | Slower to react due to equal weight on all prices. |
| Exponential Moving Average (EMA) | Gives more weight to recent prices, making it more responsive. | Faster to react to price changes. |
The Simple Moving Average (SMA) calculates the average price by summing up the closing prices over the specified period and dividing by the number of periods. For example, a 20-period SMA on a daily chart sums the closing prices of the last 20 days and divides by 20. Each price in the period has an equal weight in the calculation. While simple and effective for showing the general trend, SMAs can be slow to react to sudden price shifts because older data points carry the same influence as the most recent ones.
The Exponential Moving Average (EMA), on the other hand, is designed to be more responsive to recent price action. It does this by applying more weight to the most recent closing prices and progressively less weight to older prices. This exponential weighting scheme makes the EMA hug the price more closely and turn faster than an SMA of the same period length when the trend begins to change. Think of an SMA as a large, slow-turning ship, while an EMA is a smaller, more agile speedboat.
For strategies like the Triple Moving Average Crossover, which often rely on capturing trend changes and momentum shifts as they are happening, the EMA’s responsiveness is a significant advantage. The quicker reaction time allows signals to be generated earlier, potentially enabling traders to enter or exit positions closer to the optimal point. This is why the Triple Moving Average Crossover strategy almost universally employs EMAs rather than SMAs.
So, while SMAs provide a smooth, broad view of the trend, EMAs are often preferred for strategies that require a more dynamic response to the market’s current pulse.
Introducing the Triple EMA Setup: Three Lines, One Story
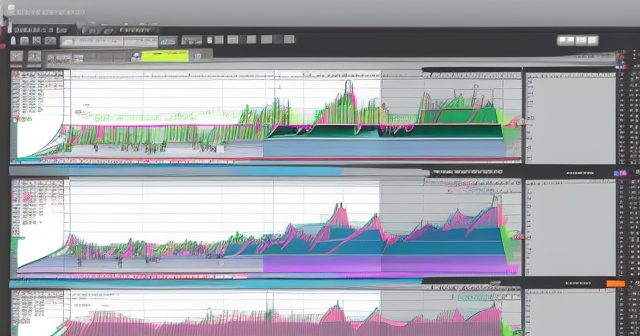
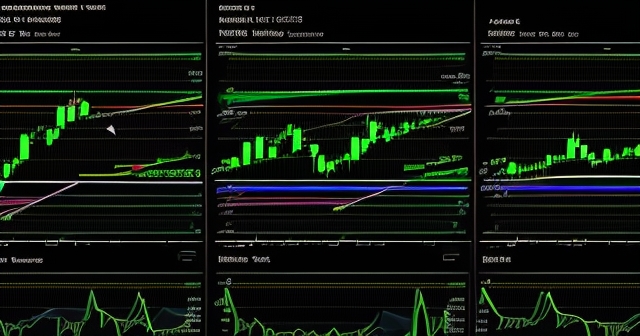
The Triple Moving Average Crossover strategy utilizes *three* Exponential Moving Averages, each calculated over a different period length. These three EMAs are typically categorized as short-term (fast), medium-term (middle), and long-term (slow). The interplay and relative positioning of these three lines on your price chart tell a powerful story about the market’s trend and momentum.
Commonly used period combinations for the three EMAs include:
- 9, 21, and 55 periods: This is a very popular combination, often attributed to trading methodologies focused on capturing trends across different cycles. The 9-period EMA is the fastest, reacting quickly to short-term price moves. The 21-period EMA represents a medium-term view, often tracking approximately one trading month (or other medium cycle). The 55-period EMA provides the slowest, long-term perspective, representing a significant number of trading periods.
- 10, 30, and 50 periods: Another widely used set of periods, offering a slightly different sensitivity. The 10-period EMA is fast, the 30-period EMA is medium, and the 50-period EMA is slow. The specific periods you choose can be fine-tuned based on the asset you are trading and the timeframe you are using, but these examples provide excellent starting points.
| EMA Combination | Short-term | Medium-term | Long-term |
|---|---|---|---|
| Combination 1 | 9 | 21 | 55 |
| Combination 2 | 10 | 30 | 50 |
Regardless of the exact periods chosen, the principle remains the same: we are tracking the average price over short, medium, and long durations simultaneously. A strong trend is indicated when these lines are neatly stacked in order, reflecting consistent momentum across different time horizons. Conversely, a lack of clear order or entanglement of the lines suggests a consolidating or ranging market where trend signals may be less reliable.
The real power of this strategy lies in the *crossovers* between these lines, which act as potential signals for shifts in trend direction and strength. We use the relationship between the faster and slower EMAs to generate actionable trading ideas.
The Bullish Crossover: Reading the Buy Signal
A **bullish crossover** in the Triple EMA strategy signals a potential upward trend and generates a buy signal. This occurs when the shorter-term EMAs cross above the longer-term EMAs, confirming increasing bullish momentum across different timeframes. The most robust bullish signal is typically confirmed when the three EMAs stack neatly in the following order, from top to bottom:
- Short-term EMA (fastest) is above the…
- Medium-term EMA (middle) is above the…
- Long-term EMA (slowest).
Imagine the lines like runners in a race. In a strong uptrend, the fastest runner (short EMA) is leading, followed by the middle runner (medium EMA), and finally the slowest runner (long EMA). When the lines move into this configuration from a previously tangled or bearish arrangement, it indicates that bullish momentum is building and becoming sustained across the market.
The classic entry signal often focuses on the interaction between the fastest and medium EMAs, especially in the context of the overall trend defined by the slowest EMA. A common interpretation for a bullish entry is:
- The Long-term EMA is sloping upwards (indicating a long-term uptrend).
- The Medium-term EMA is also sloping upwards and is above the Long-term EMA.
- A crossover occurs where the Short-term EMA crosses *above* the Medium-term EMA.
This specific crossover, with the faster line crossing the middle line while both are above the slowest line (which is pointing up), provides a strong confluence of evidence for an emerging or continuing uptrend. It suggests that short-term price momentum is now aligning with the medium- and long-term trend direction, making it a favorable time to consider a long (buy) position.
Why is this powerful? It uses multiple confirmations. The long EMA sets the overall context. The medium EMA confirms the mid-term trend. The fast EMA crossing the medium EMA is the trigger, showing that even the most sensitive average is now reflecting the bullish sentiment. This layered approach helps filter out some of the noise that a simple two-EMA crossover might produce.
The Bearish Crossover: Identifying the Sell Signal
Conversely, a **bearish crossover** signals a potential downward trend and generates a sell signal. This occurs when the shorter-term EMAs cross below the longer-term EMAs, indicating increasing bearish momentum. The most robust bearish signal is confirmed when the three EMAs stack neatly in the following order, from top to bottom:
- Long-term EMA (slowest) is above the…
- Medium-term EMA (middle) is above the…
- Short-term EMA (fastest).
Using our runners analogy again, in a strong downtrend, the fastest runner (short EMA) is trailing behind, with the medium runner (medium EMA) and slowest runner (long EMA) leading. When the lines arrange themselves in this descending order, it indicates that bearish momentum is strengthening and dominating across different time perspectives.
Similar to the bullish setup, the classic entry signal often focuses on the interaction between the fastest and medium EMAs in the context of the overall trend defined by the slowest EMA. A common interpretation for a bearish entry is:
- The Long-term EMA is sloping downwards (indicating a long-term downtrend).
- The Medium-term EMA is also sloping downwards and is below the Long-term EMA.
- A crossover occurs where the Short-term EMA crosses *below* the Medium-term EMA.
This specific crossover, with the faster line crossing below the middle line while both are below the slowest line (which is pointing down), provides strong evidence for an emerging or continuing downtrend. It suggests that short-term bearish price momentum is now aligning with the medium- and long-term trend direction, presenting a favorable opportunity to consider a short (sell) position.
Just like the bullish signal, this bearish setup uses multiple confirmations. The downward sloping long EMA sets the dominant bearish context. The medium EMA confirms the mid-term decline. The fast EMA crossing below the medium EMA serves as the tactical trigger, indicating that the most sensitive average is now reflecting bearish sentiment. This confluence of signals is what makes the triple EMA crossover a potentially powerful tool for identifying trend reversals or continuations.
Beyond Crossovers: Momentum and Interpretation Nuances
While the crossovers are key for generating entry and exit signals, the Triple EMA strategy offers more insights. The *distance* or *gap* between the three EMA lines provides valuable information about the strength and momentum of the prevailing trend.
- When the EMAs are widely separated and neatly stacked (short > medium > long for bullish, or long > medium > short for bearish), it indicates strong, sustained momentum in the direction of the trend. A widening gap suggests that the trend is accelerating.
- When the EMAs are closer together but still in the correct order, it suggests a trend is present but momentum might be weakening or consolidating.
- When the EMAs are tangled, crossing over each other frequently, and generally moving sideways, it indicates a ranging or choppy market. In such conditions, trend-following strategies like the Triple EMA Crossover are less effective and prone to generating false signals.
The medium-term EMA (e.g., the 21 or 30 EMA) can also serve as a dynamic support or resistance level. During an uptrend, price often pulls back towards the medium EMA before bouncing and continuing higher. Similarly, during a downtrend, price may retrace towards the medium EMA before resuming its fall. This makes the medium EMA a potential area to look for buy opportunities during dips in an uptrend or sell opportunities during rallies in a downtrend, using the crossover signals or price action for confirmation.
Furthermore, the medium-term EMA can be a valuable tool for setting **trailing stops**. As your profitable trade moves in the direction of the trend, you can trail your stop loss order along or just below the medium EMA (for a long position) or along or just above it (for a short position). This allows you to lock in profits as the trend progresses while giving the trade room to breathe, exiting only if the price breaks significantly against the trend, potentially signaled by a move below the medium EMA.
Understanding these nuances – the significance of the gap between lines and the role of the medium EMA as dynamic support/resistance and a trailing stop guide – can significantly enhance your application of the Triple EMA strategy, moving beyond just reacting to simple crossovers.
Implementing the Strategy: Entry, Exit, and Risk Management
So, you’ve identified a potential signal using the Triple EMA crossover. How do you translate that into an actual trade? Implementing the strategy effectively involves clear rules for entry, exit, and crucially, risk management.
Entry Points:
The most common entry points are based on the confirmed bullish or bearish crossover described earlier.
- Bullish Entry: Look for the Short EMA to cross above the Medium EMA, with both the Medium and Short EMAs above the Long EMA, and the Long EMA sloping upwards. Enter a long position ideally as soon as this alignment is confirmed, or on the close of the candle that confirms the crossover.
- Bearish Entry: Look for the Short EMA to cross below the Medium EMA, with both the Medium and Short EMAs below the Long EMA, and the Long EMA sloping downwards. Enter a short position ideally as soon as this alignment is confirmed, or on the close of the candle that confirms the crossover.
| Entry Signal | Condition | Action |
|---|---|---|
| Bullish Entry | Short EMA crosses above Medium EMA, both above Long EMA, Long EMA sloping up | Enter long position |
| Bearish Entry | Short EMA crosses below Medium EMA, both below Long EMA, Long EMA sloping down | Enter short position |
It’s important to wait for the candle to close to confirm the crossover, as crossovers can sometimes appear intraday only to reverse before the period ends (a common cause of false signals).
Exit Points:
Exiting a trade using the Triple EMA strategy can be done in several ways:
- Opposite Signal: The most straightforward exit is when the opposite crossover signal is generated. If you are in a long position, exit when a bearish crossover starts to form (e.g., the Short EMA crosses back below the Medium EMA). If you are in a short position, exit when a bullish crossover starts to form.
- Trailing Stop Loss: As discussed, using the Medium-term EMA as a trailing stop loss is highly effective. Adjust your stop loss level as the Medium EMA moves in your favor, locking in profits. If price breaks and closes significantly beyond the Medium EMA against your position, exit the trade.
- Target Profit: You might also set a specific profit target based on previous support/resistance levels or a fixed risk/reward ratio (e.g., aiming for 2 or 3 times your initial stop loss distance). Once the target is hit, exit the trade regardless of the EMA positions.
Combining these exit strategies can be beneficial. For instance, use a profit target or trailing stop, but be prepared to exit earlier if a strong opposite signal occurs.
Navigating Risk: Stop Losses with the Triple EMA
No trading strategy is foolproof, and false signals are an inherent risk with lagging indicators like moving averages. Therefore, disciplined risk management is paramount when using the Triple EMA Crossover. This begins with placing a **stop loss** order for every trade.
An initial stop loss should be placed at a level where, if reached, the original trade idea is invalidated. Using the Triple EMA setup, here are some potential ways to set initial stops:
- Below/Above Recent Swing Low/High: For a long trade, place your stop loss below the most recent significant swing low. For a short trade, place it above the most recent significant swing high.
- Below/Above the Slowest EMA: Some traders place the stop loss just below the Long-term EMA for a long trade or just above it for a short trade. This assumes that a break of the slowest EMA indicates a significant shift in the long-term trend.
- Below/Above the Medium EMA: For a tighter stop, you could place it below the Medium EMA for a long trade or above it for a short trade, perhaps adding a buffer. However, be aware that price pulls back to the Medium EMA frequently, so this might lead to being stopped out prematurely.
The choice of stop loss placement depends on your risk tolerance, the specific asset’s volatility, and the timeframe you are trading. The key is to determine your stop loss *before* entering the trade and to ensure you are risking only a small percentage of your total trading capital on any single trade (commonly 1-2%).
Once the trade moves in your favor, you can begin to trail your stop loss, as discussed in the previous section, using the Medium-term EMA as a guide. This protects your accumulated profits and allows you to participate in extended trend runs.
Remember, successful trading isn’t just about finding profitable entry signals; it’s equally about managing risk and preserving capital when trades don’t work out as planned. The Triple EMA strategy provides visual clues that can help you determine sensible stop loss placements and adjustments.
Limitations of the Triple EMA: Lag and Whipsaw
While powerful and widely used, it is crucial to understand the limitations of the Triple Moving Average Crossover strategy. Like all moving averages, the triple EMA setup is a **lagging indicator**. This means that its signals are generated *after* the price movement has already begun. Because the EMAs are based on historical price data, they will always follow price action, not predict it.
What does this lag imply?
- You may not enter a trade at the absolute bottom of a rally or the absolute top of a decline. The strategy is designed to capture the bulk of the trend, not the very beginning or end.
- In very fast-moving markets, the signal might come relatively late, reducing the potential profit or increasing the risk if you are chasing the price.
Another significant limitation is the strategy’s performance in **ranging or choppy markets**. The Triple EMA Crossover is a trend-following strategy. When the market is not trending strongly, the EMAs tend to converge, tangle, and cross over each other frequently. This leads to a **whipsaw effect**, where you might get a bullish signal followed quickly by a bearish signal, resulting in multiple losing trades as you enter and are then stopped out. Think of the lines flickering back and forth like a speedometer needle in stop-and-go traffic.
Recognizing when the market is ranging is vital. If the three EMAs are flat and crossing frequently without maintaining a clear stacked order, it is often best to avoid taking signals from the Triple EMA strategy and wait for a clearer trend to emerge or use a different type of indicator suited for sideways markets (like oscillators). Attempting to trade crossovers in a whipsaw environment is a fast way to deplete your trading capital.
Understanding these limitations – the inherent lag and the susceptibility to false signals in ranging markets – is not a reason to abandon the strategy, but rather a call to apply it intelligently and often in conjunction with other analytical tools.
Enhancing Reliability: Combining with Other Indicators
Given the limitations of any single indicator, the effectiveness of the Triple Moving Average Crossover strategy can be significantly enhanced by using it in confluence with other technical analysis tools. Combining indicators provides **confirmation**, helping to validate the signals generated by the EMAs and filter out potential false signals.
Which indicators work well in combination?
- Momentum Oscillators (e.g., RSI, MACD): If the Triple EMA gives a bullish signal, you can look for confirmation from an oscillator. For example, is the RSI above 50 and rising? Is the MACD line crossing above its signal line and potentially above the zero line? These momentum indicators can confirm the strength of the move signaled by the EMAs. Conversely, for a bearish Triple EMA signal, look for RSI below 50 or falling, and MACD crossing below its signal line/zero line.
- Trend Strength Indicators (e.g., ADX): The Average Directional Index (ADX) measures the strength of a trend, not its direction. If the Triple EMA generates a trend signal (bullish or bearish), check the ADX. Is the ADX line above 20 or 25? A rising ADX above these levels confirms that a strong trend is in place, validating the Triple EMA signal and suggesting the move has follow-through potential. If the ADX is low and flat, it indicates a ranging market, warning you that the Triple EMA signal might be false (whipsaw).
- Volume: For assets where volume data is available (stocks, futures, sometimes Forex depending on the feed), look for increasing volume accompanying a Triple EMA crossover signal. Strong trends are typically supported by increasing volume.
- Support and Resistance Levels: Plotting horizontal support and resistance levels, pivot points, or using Fibonacci retracements can provide crucial context. Is a Triple EMA buy signal occurring just below a major resistance level? This might be a less reliable signal. Is a buy signal occurring after a bounce off a strong support level? This adds conviction.
- Candlestick Patterns: Look for bullish candlestick patterns (like engulfing patterns, hammers, morning stars) coinciding with a bullish Triple EMA crossover at a potential support level. Look for bearish patterns (engulfing, shooting stars, evening stars) coinciding with a bearish crossover at resistance.
By requiring multiple indicators to align before entering a trade, you increase the probability of success and reduce the likelihood of falling victim to false signals, especially in choppy market conditions. This approach embodies the principle of confirmation, a cornerstone of robust technical analysis.
If you are considering diversifying your trading activities, especially into currency markets, finding a platform that supports multiple indicators and offers a wide range of instruments is key. If you’re considering exploring Forex trading or other CFD products, Moneta Markets is a platform worth considering. Based in Australia, it offers over 1000 financial instruments, suitable for both new and experienced traders.
Applying the Strategy Across Timeframes and Markets
One of the significant advantages of the Triple Moving Average Crossover strategy is its versatility. It can be applied across virtually any liquid financial market, including Forex, stocks, commodities, and cryptocurrencies. Furthermore, it is effective across different timeframes, from short-term charts suitable for scalping or intraday trading (like 5-minute or 15-minute charts) to longer-term charts for swing trading or position trading (like 4-hour, daily, or weekly charts).
The choice of EMA periods might need to be adjusted slightly depending on the timeframe and the volatility of the specific asset. While 9/21/55 or 10/30/50 are good starting points, you might find that slightly different periods work better for a very volatile asset on a short timeframe compared to a less volatile asset on a daily chart. Experimentation and backtesting on historical data are essential steps to find the optimal settings for your specific trading context.
| Timeframe | Potential EMA Setting | Purpose |
|---|---|---|
| Scalping/Intraday | 5/10/20 | Quick reaction to price movements |
| Swing Trading | 9/21/55 | Identify medium-term trends |
| Position Trading | 20/50/100 | Long-term trend identification |
A common and powerful technique is using the Triple EMA strategy in conjunction with **multiple timeframes**.
- Identify the dominant trend on a longer timeframe (e.g., a Daily chart) using the Triple EMA setup. Ensure the EMAs are properly stacked and trending clearly.
- Then, drop down to a shorter timeframe (e.g., a 4-hour or 1-hour chart) to look for entry signals in the *direction* of the longer-term trend. For example, if the Daily chart shows a strong uptrend (EMAs stacked bullish), you would only look for bullish crossovers on the 4-hour chart to time your entry. You would ignore bearish crossovers on the shorter timeframe as they are likely just minor pullbacks against the main trend.
This multi-timeframe approach leverages the strength of the Triple EMA strategy (trend identification) while using different timeframes to confirm the overall bias and improve the timing of your entries. It helps to avoid trading against the dominant force in the market, increasing the probability of your trades working out.
Implementing multi-timeframe analysis and testing different settings requires a robust trading platform. When selecting a trading platform, consider the flexibility and technical advantages offered. Moneta Markets supports popular platforms like MT4, MT5, and Pro Trader, combining high-speed execution with competitive spreads for a good trading experience.
Choosing the Right Periods: A Balancing Act
Selecting the ‘right’ periods for your short, medium, and long-term EMAs is not a one-size-fits-all decision. The standard 9/21/55 or 10/30/50 sets are widely used and effective for many markets and timeframes, but they represent a starting point, not an absolute rule.
The goal is to choose periods that allow the fastest EMA to be responsive enough to capture early trend shifts, the medium EMA to represent the core momentum, and the slowest EMA to reflect the underlying, longer-term trend direction while filtering out minor noise. The periods should be sufficiently spaced out to prevent constant tangling in all but the choppiest conditions, but not so far apart that signals are excessively delayed.
- Shorter periods (e.g., 5, 10, 20) make the EMAs more sensitive to price changes, leading to earlier signals but also more false signals and whipsaw. This might be suitable for very short timeframes or highly volatile assets if you prioritize early entry.
- Longer periods (e.g., 20, 50, 100 or 50, 100, 200) make the EMAs smoother and less prone to whipsaw, but the signals will be significantly delayed. This is more suitable for identifying very long-term trends and reducing noise, potentially on daily or weekly charts for position trading.
Finding your preferred periods involves a balancing act between responsiveness and signal reliability. It’s highly recommended to **backtest** different period combinations on the specific asset and timeframe you intend to trade. Look at historical charts and see how different EMA settings performed during trending periods and choppy periods. Did a particular set of periods provide timely signals during trends and fewer false signals during consolidation? Backtesting helps you understand the behavior of the indicators under different market conditions and build confidence in your chosen settings.
Additionally, forward testing (trading with the chosen settings in real-time on a demo account) is crucial before risking live capital. This allows you to see how the strategy performs in current market conditions and helps you refine your execution and discipline.
Conclusion: A Powerful Tool for Trend Followers
The Triple Moving Average Crossover strategy is a classic and enduring technique in technical analysis for good reason. By layering three Exponential Moving Averages of different lengths, it provides a robust framework for identifying market trends, assessing their momentum, and generating potential trade signals.
We have seen how the orderly stacking of the short, medium, and long-term EMAs indicates strong trends, while their crossovers signal potential shifts in direction. We’ve explored how the distance between the lines reflects momentum strength and how the medium-term EMA can serve a dual purpose as dynamic support/resistance and a guide for trailing stops.
While acknowledging that it is a lagging indicator and susceptible to whipsaw in ranging markets, its limitations are not insurmountable. By combining the Triple EMA Crossover with other confirming indicators like RSI, MACD, or ADX, and by applying it judiciously using multi-timeframe analysis, its reliability can be significantly enhanced. Disciplined risk management, including the strategic placement of stop losses, is essential for protecting capital and ensuring long-term sustainability.
Mastering the Triple Moving Average Crossover requires practice, patience, and a commitment to testing and refining your chosen settings. However, for traders looking for a visually clear, versatile, and effective method for identifying and following market trends, this strategy offers a solid foundation. Integrate it into your analytical toolkit, practice its application, and you will find yourself better equipped to navigate the complexities of the financial markets.
If you are seeking a regulated broker that facilitates global trading, Moneta Markets holds multiple regulatory certifications, including FSCA, ASIC, and FSA. They offer segregated client funds, free VPS, and 24/7 multilingual customer support, making them a preferred choice for many traders.
triple moving average crossoverFAQ
Q:What is the purpose of using three moving averages?
A:Using three moving averages allows traders to capture momentum across different timeframes and confirm trends more reliably.
Q:How does the bullish crossover signal a buy?
A:A bullish crossover occurs when the short-term EMA crosses above the medium-term EMA, indicating increasing bullish momentum.
Q:What are the risks associated with the Triple Moving Average Crossover strategy?
A:The risks include lagging signals that may lead to missed opportunities and false signals in choppy or ranging markets.