
Mastering Candlestick Patterns: Your Essential Trading Cheat Sheet
Welcome, aspiring traders and those looking to deepen your technical analysis skills! Have you ever looked at a price chart and felt like you were staring at a foreign language? Those colorful bars or lines can seem daunting at first glance, but they hold incredibly valuable information about market sentiment and potential price movements. Today, we’re going to unlock one of the most powerful visual tools available to traders: candlestick patterns.
Originating from Japan centuries ago to track rice prices, candlestick charting has evolved into a fundamental element of modern financial analysis. It provides a rich visual narrative of price action within a specific period, offering insights that simple line or bar charts might miss. Think of each candlestick as a concise story of the battle between buyers (bulls) and sellers (bears) during that timeframe. By learning to read these stories, you can gain a significant edge in identifying potential trading opportunities.
In this comprehensive guide, designed to serve as your personal candlestick patterns cheat sheet, we will break down everything you need to know. We’ll start with the basic anatomy of a single candlestick and progressively explore how single, double, and even triple candlestick formations can signal potential market reversals, continuations, or periods of indecision. Our goal is to equip you with the knowledge to quickly identify these patterns on your charts and understand their implications, much like having a trusted mentor guiding you through the visual language of the market.
Before we delve into the fascinating world of patterns, we must first understand the building blocks: the individual candlestick itself. Every candlestick, regardless of the timeframe you are viewing (whether it’s a 1-minute, 1-hour, or daily chart), represents four key pieces of information for that specific period. Let’s dissect these components:
- The Body: This is the thick rectangular part of the candlestick. The body represents the range between the open price and the close price for that period.
- The Wicks (or Shadows): These are the thin lines extending above and below the body. The upper wick indicates the highest price reached during the period, while the lower wick shows the lowest price reached.
- Color: The color of the body tells us the relationship between the open and close prices.
- A Bullish Candlestick (often colored green or white) forms when the close price is *higher* than the open price. This indicates that buyers were in control during that period, pushing the price up from where it started.
- A Bearish Candlestick (often colored red or black) forms when the close price is *lower* than the open price. This indicates that sellers dominated the period, pushing the price down from its open.
So, a single green candle with a long body signifies strong buying pressure, ending the period significantly higher than it began. Conversely, a red candle with a long body indicates strong selling pressure, closing much lower than the open. Wicks show the extremes – price *tried* to go higher (upper wick) or lower (lower wick) but couldn’t sustain that level, indicating potential price rejection at those extremes.
Understanding this basic anatomy is crucial because patterns are simply specific combinations and appearances of these individual candles. Each element contributes to the overall story the pattern is telling you about the market dynamics at that moment.
Beyond just the open, high, low, and close, the *size* of the body and wicks of a candlestick provides immediate visual clues about the intensity and nature of the price action. Learning to interpret these sizes is like listening to the subtle nuances in the market’s voice.
- Long Body: A candlestick with a long body (either bullish or bearish) suggests strong momentum in one direction. A long green body means buyers were aggressive and held control throughout the period. A long red body means sellers were dominant and pushed the price significantly lower. This indicates conviction behind the move.
- Short Body: A candlestick with a short body suggests minimal price movement between the open and close. This indicates indecision or consolidation. Neither buyers nor sellers were able to take significant control during the period.
- Long Wicks/Shadows: Long wicks indicate that price moved significantly beyond the open and close, but was pushed back.
- A long upper wick suggests that buyers tried to push the price higher, but sellers stepped in and pushed it back down before the close. This can be a sign of potential resistance or selling pressure entering the market, especially if found after an uptrend.
- A long lower wick suggests that sellers tried to push the price lower, but buyers stepped in and pushed it back up before the close. This can indicate potential support or buying pressure entering the market, particularly if it occurs after a downtrend.
- Short or Absent Wicks: Short wicks suggest that most of the price action stayed contained between the open and close. A candlestick with a long body and very short or no wicks (a “Marubozu”) signifies extreme strength and conviction in the direction of the body’s color, with the close happening near the high (bullish) or low (bearish).
By simply observing the proportions of the body relative to the wicks, you can quickly gauge the strength of the move and the presence (or absence) of price rejection. For instance, a small body with long wicks might indicate a battle where neither side won decisively, while a large body with short wicks shows a clear winner for the period. As we explore specific patterns, you’ll see how these body and wick characteristics combine across multiple candles to form recognizable signals.
Our journey into patterns begins with single candlesticks that, on their own, can provide valuable insights, particularly when viewed in the context of the preceding price trend. While less reliable than multi-candle patterns, these foundational signals can alert you to potential shifts or continuations in market sentiment. Let’s look at some of the most significant ones.
| Pattern | Appearance | Signal |
|---|---|---|
| The Hammer | Small body at top with long lower wick | Bullish reversal signal |
| The Hanging Man | Identical to Hammer, after an uptrend | Bearish reversal signal |
| The Inverted Hammer | Small body at bottom with long upper wick | Bullish reversal signal |
The Hammer:
- Appearance: A small body (either bullish or bearish) located near the top of the trading range, with a long lower wick that is typically two or more times the length of the body. The upper wick is either very short or non-existent.
- Context: Most significant when it appears after a distinct downtrend.
- Signal: A potential bullish reversal signal. The long lower wick shows that sellers initially pushed the price down significantly, but buyers aggressively stepped in and pushed the price back up, often closing near or even above the open. This indicates strong buying pressure entering the market and rejecting lower prices.
- Psychology: Sellers lose control as buyers absorb selling pressure and reverse the direction within the period.
The Hanging Man:
- Appearance: Identical in shape to the Hammer (small body at the top, long lower wick, very short or no upper wick). The body can be bullish or bearish.
- Context: Most significant when it appears after a distinct uptrend.
- Signal: A potential bearish reversal signal. Like the Hammer, sellers pushed price down, but buyers brought it back up. However, because this occurs after an uptrend, the long lower wick represents selling pressure starting to emerge. While buyers managed to recover by the close, the fact that sellers could push it down so far is a warning sign that the bulls might be losing control.
- Psychology: Buyers are unable to maintain the high prices, and significant selling appears during the period.
The Inverted Hammer:
- Appearance: A small body (bullish or bearish) located near the bottom of the trading range, with a long upper wick that is typically two or more times the length of the body. The lower wick is very short or non-existent.
- Context: Most significant when it appears after a distinct downtrend.
- Signal: A potential bullish reversal signal. The long upper wick shows that buyers tried to push the price up, but sellers pushed it back down before the close. However, after a downtrend, the fact that buyers *could* push price up so far is a positive sign, indicating potential buying interest emerging. Confirmation (a strong bullish candle in the next period) is often needed.
- Psychology: Buyers test higher prices but are rejected, yet the low remains firm, suggesting potential strength building.
The Shooting Star:
- Appearance: Identical in shape to the Inverted Hammer (small body at the bottom, long upper wick, very short or no lower wick). The body can be bullish or bearish.
- Context: Most significant when it appears after a distinct uptrend.
- Signal: A potential bearish reversal signal. Similar to the Inverted Hammer, buyers pushed price up, but sellers drove it back down. After an uptrend, this indicates sellers successfully defended higher prices, suggesting potential resistance and a weakening of bullish momentum.
- Psychology: Buyers attempt to push the price higher but face strong resistance, with sellers regaining control by the close.
Not all single candles signal potential reversals. Some indicate market indecision, while others show extreme momentum. These patterns also provide crucial pieces of information about the current market state.
The Doji:
- Appearance: Has a very small or non-existent body, essentially looking like a cross, inverted cross, or plus sign. This means the open price and the close price for the period were either exactly the same or very close. Wicks can vary in length.
- Context: Can appear anywhere, but their significance is heightened at market tops, bottoms, or after long directional moves.
- Signal: Represents indecision in the market. Neither buyers nor sellers could gain control, and the price ended up right back where it started. After a strong uptrend or downtrend, a Doji can signal that the trend may be losing momentum and a potential reversal is on the horizon, as the conviction of the dominant force wanes. In sideways markets, they are less significant.
- Variations of Doji:
- Long-Legged Doji: Long upper and lower wicks, indicating significant price movement in both directions within the period, but a close near the open. Extreme indecision and volatility.
- Gravestone Doji: No lower wick, and a long upper wick. Looks like a tombstone. The open and close are near the low of the period. If it appears after an uptrend, it’s a bearish signal, showing buyers pushed price up but sellers completely rejected higher prices.
- Dragonfly Doji: No upper wick, and a long lower wick. Looks like a dragonfly. The open and close are near the high of the period. If it appears after a downtrend, it’s a bullish signal, showing sellers pushed price down but buyers completely rejected lower prices.
The Spinning Top:
- Appearance: Has a small body (bullish or bearish) with relatively long upper and lower wicks that are roughly equal in length.
- Context: Similar to Doji, significant after a strong trend.
- Signal: Also indicates indecision. The long wicks show that both buyers and sellers were active, pushing price in both directions, but neither could maintain control, resulting in a small body. After a long trend, it suggests the current move is losing conviction and a potential change in direction or a period of consolidation might follow.
- Psychology: Price swings widely, but ends near the open, showing a stalemate.
The Marubozu:
- Appearance: A candlestick with a long body and virtually no wicks (or extremely short ones).
- Context: Can appear during strong trend moves or breakouts.
- Signal: Indicates extreme momentum and conviction. A Bullish Marubozu (long green/white body) opens at the low and closes at the high, showing buyers were in complete control for the entire period. A Bearish Marubozu (long red/black body) opens at the high and closes at the low, showing sellers dominated the entire period. This suggests the trend is very strong in the direction of the Marubozu.
- Psychology: One side (buyers or sellers) completely overwhelmed the other from open to close.
Moving beyond single candles, patterns formed by the interaction of two consecutive candlesticks often provide more reliable signals. They tell a slightly longer story, incorporating the sentiment and price action over two distinct periods. These patterns are particularly powerful when they appear at significant price levels or after established trends.
| Pattern | Appearance | Signal |
|---|---|---|
| The Engulfing Pattern | Second candle completely engulfs the first | Reversal signal |
| The Harami Pattern | Second candle contained within first | Indecision signal |
| The Piercing Line | Bullish candle opening below the first | Bullish reversal signal |
The Engulfing Pattern:
- Appearance: Consists of two candles. The second candle has a body that completely ‘engulfs’ or covers the entire body of the first candle. The color of the second candle must be the opposite of the first.
- Bullish Engulfing: Occurs after a downtrend. The first candle is bearish (red/black). The second candle is bullish (green/white) with a body large enough to completely surround the body of the first candle. The close of the second candle is above the open of the first.
- Bearish Engulfing: Occurs after an uptrend. The first candle is bullish (green/white). The second candle is bearish (red/black) with a body large enough to completely surround the body of the first candle. The close of the second candle is below the open of the first.
- Signal: A strong reversal signal. The engulfing candle shows a significant shift in momentum, with the new dominant force completely overpowering the previous period’s price action. Bullish Engulfing suggests buyers have taken strong control, pushing price up significantly after a down move. Bearish Engulfing suggests sellers have taken strong control, pushing price down heavily after an up move.
- Psychology: The battle in the first period is decisively lost by the previous trend’s participants in the second period.
The Harami Pattern:
- Appearance: The opposite of an Engulfing pattern. Consists of two candles. The second candle’s body is small and completely contained *within* the body of the first candle. The colors are opposite.
- Bullish Harami: Occurs after a downtrend. The first candle is bearish (red/black) and has a large body. The second candle is bullish (green/white) and has a small body completely within the first candle’s body.
- Bearish Harami: Occurs after an uptrend. The first candle is bullish (green/white) and has a large body. The second candle is bearish (red/black) and has a small body completely within the first candle’s body.
- Signal: A potential reversal signal, though generally less strong than the Engulfing pattern. The large first candle continues the previous trend, but the small second candle indicates a sudden loss of momentum and indecision entering the market. This suggests the trend might be pausing or running out of steam.
- Psychology: The strong move in the first period is met with a sudden halt and uncertainty in the second.
The Piercing Line (Bullish):
- Appearance: Occurs after a downtrend. The first candle is a long bearish (red/black) candle. The second candle is a long bullish (green/white) candle that opens below the low of the first candle but closes more than halfway up the body of the first candle.
- Signal: A potential bullish reversal signal. After a strong bearish move, the market opens even lower (showing continued selling pressure), but buyers step in with enough strength to push price back up significantly, piercing deep into the territory of the previous bearish candle. This shows a strong rejection of lower prices and a potential shift in control to buyers.
- Psychology: Sellers attempt to continue the downtrend with a gap down, but are decisively met by aggressive buyers.
The Dark Cloud Cover (Bearish):
- Appearance: Occurs after an uptrend. The first candle is a long bullish (green/white) candle. The second candle is a long bearish (red/black) candle that opens above the high of the first candle but closes more than halfway down the body of the first candle.
- Signal: A potential bearish reversal signal. After a strong bullish move, the market opens even higher (showing continued buying pressure), but sellers step in powerfully, pushing price back down significantly, creating a ‘dark cloud’ over the previous bullish candle’s gain. This indicates strong selling pressure entering the market and rejecting higher prices.
- Psychology: Buyers attempt to continue the uptrend with a gap up, but are decisively met by aggressive sellers.
The Tweezer Tops (Bearish) and Tweezer Bottoms (Bullish):
- Appearance: Two consecutive candles (can be bullish or bearish, but often opposite colors) where the highs (Tops) or lows (Bottoms) are identical or very close to identical.
- Tweezer Tops: Occur after an uptrend. The first candle’s high is the same as the second candle’s high. This indicates sellers rejected the exact same high price in two consecutive periods.
- Tweezer Bottoms: Occur after a downtrend. The first candle’s low is the same as the second candle’s low. This indicates buyers rejected the exact same low price in two consecutive periods.
- Signal: Potential, though weaker, reversal signals. They show that price hit a very specific level and was rejected there repeatedly, indicating potential support (Bottoms) or resistance (Tops) at that level.
- Psychology: A specific price level acts as a ceiling or floor for two consecutive periods, halting the prior move.
Triple candlestick patterns involve the interaction of three consecutive candles and are generally considered more reliable reversal signals than single or double patterns. This is because they incorporate price action over three periods, providing a more comprehensive view of the shifting power balance between buyers and sellers.
| Pattern | Appearance | Signal |
|---|---|---|
| The Morning Star | Three candles, downtrend, small-bodied | Bullish reversal |
| The Evening Star | Three candles, uptrend, small-bodied | Bearish reversal |
| Three White Soldiers | Three consecutive bullish candles | Bullish continuation/reversal |
| Three Black Crows | Three consecutive bearish candles | Bearish continuation/reversal |
The Morning Star (Bullish Reversal):
- Appearance: Occurs after a downtrend and consists of three candles.
- The first candle is a long bearish (red/black) candle, continuing the downtrend.
- The second candle is a small-bodied candle (could be bullish, bearish, or a Doji) that gaps lower than the first candle’s body. This small candle represents indecision or a significant slowing of the downtrend momentum.
- The third candle is a long bullish (green/white) candle that closes well into the body of the first bearish candle, ideally closing above the halfway point. It typically gaps up from the second candle’s body.
- Signal: A strong bullish reversal signal. The long downtrending candle is followed by a period of indecision or slight recovery (the second candle), indicating the selling pressure is waning. The large bullish third candle confirms that buyers have stepped in decisively and reversed the direction.
- Psychology: Sellers dominate, then stall, and finally buyers take overwhelming control.
The Evening Star (Bearish Reversal):
- Appearance: Occurs after an uptrend and is the bearish equivalent of the Morning Star. It consists of three candles.
- The first candle is a long bullish (green/white) candle, continuing the uptrend.
- The second candle is a small-bodied candle (could be bullish, bearish, or a Doji) that gaps higher than the first candle’s body. This small candle signifies indecision or a pause in the uptrend momentum.
- The third candle is a long bearish (red/black) candle that closes well into the body of the first bullish candle, ideally closing below the halfway point. It typically gaps down from the second candle’s body.
- Signal: A strong bearish reversal signal. The strong uptrending candle is followed by a period of indecision or stalling (the second candle), indicating buying pressure is weakening. The large bearish third candle confirms that sellers have taken dominant control and reversed the direction.
- Psychology: Buyers dominate, then stall, and finally sellers take overwhelming control.
The Three White Soldiers (Bullish Continuation/Reversal):
- Appearance: Consists of three consecutive long bullish (green/white) candles. Each candle opens within the body of the previous candle and closes near its high, making consecutive higher closes.
- Context: Most significant after a downtrend (as a reversal) or during a period of consolidation (as a continuation).
- Signal: A strong bullish signal. Shows sustained and increasing buying pressure over three periods. Indicates that buyers are clearly in control and the price is likely to continue moving upwards.
- Psychology: Buyers are consistently aggressive, pushing price higher steadily.
The Three Black Crows (Bearish Continuation/Reversal):
- Appearance: Consists of three consecutive long bearish (red/black) candles. Each candle opens within the body of the previous candle and closes near its low, making consecutive lower closes.
- Context: Most significant after an uptrend (as a reversal) or during a period of consolidation (as a continuation).
- Signal: A strong bearish signal. Shows sustained and increasing selling pressure over three periods. Indicates that sellers are clearly in control and the price is likely to continue moving downwards.
- Psychology: Sellers are consistently aggressive, pushing price lower steadily.
While reversal patterns often grab the spotlight, patterns indicating indecision or trend continuation are equally important. They help you understand when the market is pausing, consolidating, or simply reinforcing the current direction. We’ve touched on some single candles of indecision like the Doji and Spinning Top; let’s consider their role further and look at others.
Doji and Spinning Tops, especially when appearing after a prolonged trend, serve as significant warning signs of potential trend exhaustion. However, if they appear within a trading range or during a choppy market, their signal value is diminished. They simply reflect the ongoing balance of power struggles in a non-trending environment. It’s their *location* on the chart that adds weight to their meaning.
Marubozu candles, as mentioned, are powerful indicators of momentum. A Bullish Marubozu in an uptrend confirms the strength and likely continuation of that trend. A Bearish Marubozu in a downtrend signals strong selling and likely further downward movement. They show conviction is high in the current direction.
While less common as named single- or multi-candle ‘patterns’ in the traditional sense, understanding sequences is also key. For instance, a series of small-bodied candles with overlapping ranges after a strong move often suggests consolidation or a ‘resting’ period before the next move. Conversely, a series of large-bodied candles with little overlap reinforces a strong trend.
Candlestick analysis isn’t just about memorizing shapes; it’s about interpreting the underlying psychology reflected in those shapes and how they fit into the broader picture of price action. Are buyers or sellers stepping up? Are they succeeding? Is the market pausing to gather breath? These are the questions these patterns help you answer.
This is perhaps the most critical point for mastering candlestick patterns: a pattern is rarely a standalone signal. Its reliability and significance are vastly amplified when viewed within the broader market context. Two key contextual elements are the prevailing trend and the presence of significant support or resistance levels.
Trend:
Candlestick reversal patterns are most meaningful when they appear at the *end* of a clear, established trend. A Hammer pattern appearing after a significant downtrend has much higher predictive value for a bullish reversal than the exact same pattern appearing in the middle of a strong uptrend (where it might indicate a temporary dip). Similarly, a Shooting Star after a long rally is a serious bearish warning, but less so during sideways consolidation. Identifying the trend using tools like moving averages or simply drawing trend lines is a vital first step before relying on a pattern.
Support and Resistance:
Think of support and resistance levels as invisible battle lines on the chart where price has historically struggled to break through.
- Support: A level where buying interest is strong enough to halt or reverse a decline.
- Resistance: A level where selling interest is strong enough to halt or reverse an advance.
When a bullish reversal pattern (like a Hammer, Bullish Engulfing, or Morning Star) appears exactly at a recognized support level, the signal is significantly stronger. It suggests that buyers are not only gaining momentum (as shown by the pattern) but are doing so at a price level where demand is expected to be high. Conversely, a bearish reversal pattern (like a Shooting Star, Bearish Engulfing, or Evening Star) forming right at a resistance level indicates that sellers are taking control at a price point where supply is expected to overwhelm demand. Identifying these key levels enhances the probability that a pattern signal will be valid.
Ignoring context and trading every pattern you see, regardless of the trend or location, is a common mistake that can lead to frustrating false signals. Always zoom out, identify the trend, mark key support and resistance areas, and then look for patterns appearing at these confluence points.
Confirmation: The Trader’s Essential Second Step (Volume, Other Indicators)
We cannot stress this enough: candlestick patterns provide *signals*, not guarantees. Markets are complex systems influenced by countless factors. To increase the probability of a pattern playing out as expected, it is absolutely essential to seek confirmation from other sources before taking a trading action.
Volume:
Volume, which represents the number of shares or contracts traded during a specific period, is one of the most powerful confirmation tools. Increased volume adds conviction to a candlestick signal.
- For a bullish reversal pattern (like a Hammer or Bullish Engulfing) appearing after a downtrend, confirmation is often sought with a significant *increase* in volume on the reversal candle(s). This shows that a large number of buyers participated in pushing the price up, indicating strong conviction behind the potential reversal.
- For a bearish reversal pattern (like a Shooting Star or Bearish Engulfing) after an uptrend, confirmation can be seen with increased volume on the bearish candle(s). This indicates strong selling pressure entering the market.
- Low volume accompanying a pattern, especially a reversal pattern, can suggest that the signal is weak and may not lead to a sustained move.
Other Technical Indicators:
Combining candlestick analysis with other technical indicators can provide further layers of confirmation. For example:
- Moving Averages: Does a bullish reversal pattern appear as price bounces off a key moving average (like the 50-period or 200-period MA)? Does a bearish pattern form as price is rejected by a moving average acting as resistance?
- Oscillators (RSI, MACD, Stochastic): Is the pattern appearing as an oscillator shows oversold (for bullish patterns) or overbought (for bearish patterns) conditions? Is there divergence between the price and the oscillator?
- Trendlines and Channels: Does the pattern occur at the touch of a trendline or the boundary of a price channel?
By requiring multiple tools to align – a candlestick pattern indicating potential reversal at a key level, confirmed by increasing volume and perhaps an overbought/oversold reading from an oscillator – you significantly improve the odds in your favor and avoid acting on false signals. Confirmation helps filter out the noise and focus on the higher-probability trading opportunities.
Your Essential Candlestick Patterns Cheat Sheet: A Practical Tool
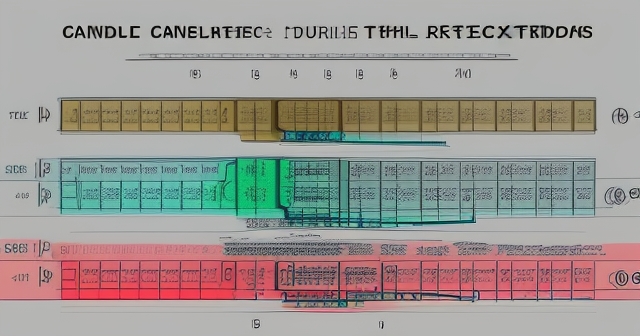
With dozens of candlestick patterns to learn, remembering their names, appearances, and signals in the heat of live trading can be challenging. This is where a well-designed candlestick patterns cheat sheet becomes an invaluable tool. Think of it as your quick-reference guide, readily available to help you quickly identify what you’re seeing on the chart and recall its typical meaning.
What should a good cheat sheet include? It should ideally provide clear visual representations of the most common and reliable patterns, categorized by type (single, double, triple) and bias (bullish, bearish, neutral). For each pattern, it should briefly list:
- The Pattern’s Name
- A clear diagram showing its appearance
- The required context (e.g., needs to appear after a downtrend)
- The signal it typically gives (e.g., Bullish Reversal)
Having this information at your fingertips allows you to rapidly scan your charts, spot potential patterns, and then verify their meaning without having to rack your brain or search online during crucial trading moments. This is particularly helpful for new traders who are still building their pattern recognition skills.
While a cheat sheet is excellent for identification, remember it’s just a tool for *recognizing* the signal. It doesn’t replace the need for confirmation, context, and a sound trading plan. Use it to quickly spot possibilities, then apply your broader technical analysis knowledge to evaluate the strength and reliability of that signal before making a trading decision.
Integrating Candlestick Analysis into a Robust Trading Strategy
Identifying candlestick patterns is a skill, but applying that skill effectively requires integrating it into a larger, robust trading strategy. Patterns can serve various roles within your plan, from signaling potential entry and exit points to helping you manage risk.
Entry Signals: Candlestick reversal patterns are often used to signal potential entry points in the opposite direction of the prior trend. For example, seeing a Bullish Engulfing pattern form at a support level, confirmed by increasing volume, might trigger a long entry. Or a Shooting Star at resistance with bearish divergence on an oscillator could signal a short entry.
Exit Signals (Take Profit): While less commonly taught, some patterns can signal potential trend exhaustion, suggesting it might be a good time to take profit. A Doji or Spinning Top after a strong move in the direction of your trade, especially at a potential resistance (if long) or support (if short) level, could indicate the move is losing steam.
Stop Loss Placement: Candlestick patterns can help define logical stop loss levels. For a bullish reversal pattern, placing your stop loss just below the low of the pattern (or the low of the confirming candle) is a common strategy. For a bearish pattern, placing the stop just above the high of the pattern provides a clear invalidation point if the market continues against your expected direction. This helps you manage risk by ensuring you exit the trade if the pattern signal fails.
Risk Management: By providing potential entry and stop loss points, candlestick patterns enable you to calculate the risk per trade (distance between entry and stop loss). You can then size your position appropriately based on your overall risk tolerance (e.g., risking no more than 1-2% of your account per trade).
Remember that candlestick patterns are best used in conjunction with other elements of your trading plan. They might provide the ‘trigger’ to enter, but your decision should be supported by trend analysis, key levels, and confirmation from other indicators. Don’t let a single pattern dictate your entire trading decision; use it as one piece of evidence in your overall analysis.
If you’re considering starting Forex trading or exploring more CFD instruments, then Moneta Markets is a platform worth considering. It comes from Australia, offering over 1000 financial instruments, suitable for both beginners and professional traders.
Mastering Candlesticks: Overcoming Limitations and Practicing Wisely
Like any technical analysis tool, candlestick patterns are not foolproof. Relying solely on patterns without understanding their limitations and applying best practices can lead to losses. Awareness of these aspects is key to truly mastering candlestick analysis and upholding the principle of trustworthiness in your trading approach.
Common Limitations and Pitfalls:
- False Signals: Patterns can fail, especially in volatile or choppy markets, or when traded without confirmation and context.
- Over-Reliance: Treating a pattern as a guaranteed prediction rather than a probabilistic signal.
- Ignoring Timeframe: A pattern on a 1-minute chart is less significant than the same pattern on a daily or weekly chart, as longer timeframes provide a clearer view of the dominant trend and psychology.
- Selective Vision: Only seeing the patterns you *want* to see based on your bias, rather than objectively identifying what the chart is presenting.
- Pattern Variations: Candlesticks and patterns are rarely textbook perfect. Learning to identify variations and understanding when a less-than-perfect pattern still holds significance comes with practice.
Best Practices for Mastery:
- Practice, Practice, Practice: The best way to learn patterns is by reviewing historical charts. Scroll back and identify patterns, see if they worked out, and analyze the context and confirmation (or lack thereof).
- Focus on High-Probability Patterns: Start by mastering the most reliable patterns (Engulfing, Morning/Evening Star, Three Soldiers/Crows) and those that frequently occur in your chosen markets and timeframes.
- Always Seek Confirmation: Never trade solely based on a pattern. Use volume, support/resistance, trend analysis, and other indicators to validate the signal.
- Understand the Psychology: For each pattern, think about *why* it forms. What does it tell you about the battle between buyers and sellers during those periods? This deeper understanding makes the pattern more meaningful than just a shape.
- Use a Cheat Sheet (Wisely): Use your cheat sheet for quick identification, but don’t let it replace your understanding of context and confirmation.
- Start Small (or Demo Trade): When you begin incorporating patterns into live trading, start with small position sizes or use a demo account to practice applying the concepts without risking significant capital.
Mastery of candlestick patterns is an ongoing process. It requires study, diligent practice, and a commitment to combining this visual analysis with other robust trading principles.
Conclusion: Navigating the Markets with Candlestick Acumen
You’ve now embarked on a journey to understand the visual language of the market through candlestick patterns. From the basic anatomy of a single candle to the complex interactions of triple formations, these patterns offer invaluable insights into market sentiment, potential trend reversals, and continuation signals. We’ve explored the most important patterns, learned how body and wick sizes tell their own story, and perhaps most importantly, emphasized the critical role of context, confirmation, and disciplined application.
A candlestick patterns cheat sheet is indeed a valuable tool to help you quickly identify formations during live trading. However, true proficiency comes not just from recognition, but from understanding the psychology behind each pattern and, crucially, from validating signals with volume, key support/resistance levels, and other technical indicators. No single tool is perfect, and patterns are probabilistic signals, not guarantees.
By diligently practicing pattern identification on historical charts, understanding the market context in which patterns appear, and always seeking confirmation, you can significantly enhance the reliability of your candlestick analysis. Integrating this skill into your overall trading strategy for entries, exits, and risk management will empower you to make more informed decisions.
Remember that the market is a dynamic environment. Continuously studying and refining your understanding of how these patterns behave in different market conditions and across various assets (be it stocks, commodities, cryptocurrencies, or Forex) is key to long-term success. Consider this guide your starting point – a foundation upon which to build your expertise. Keep practicing, stay disciplined, and let the fascinating world of candlestick patterns illuminate your path in the financial markets.
When choosing a trading platform, Moneta Markets‘ flexibility and technical advantages are worth mentioning. It supports popular platforms such as MT4, MT5, and Pro Trader, combining high-speed execution with low spread settings to provide a good trading experience.
candlestick patterns cheat sheetFAQ
Q:What are candlestick patterns?
A:Candlestick patterns are formations created by one or more candlesticks on a price chart that indicate potential market sentiment and future price movements.
Q:How can I identify a bullish reversal pattern?
A:A bullish reversal pattern can be identified by looking for specific formations such as the Hammer or Bullish Engulfing pattern appearing at the end of a downtrend.
Q:What role does volume play in confirming candlestick patterns?
A:Volume supports the validity of a candlestick pattern; increased volume on reversal candles signals stronger market conviction in the reversal direction.